

We know from our life experiences that even the most helpful tool could be left unused if we do not know how to use it properly or it takes too much time to learn it, and we do not want this to be the case with our tool. In this getting started video, you will learn fast and easy how to use @PROCESIO to integrate applications and process data. You could only watch the video, or you could also build along. We recommend the second option as nothing can replace a hands-on experience. To build and run the demo process, you only need a free PROCESIO account that you can obtain in a minute. Go to https://procesio.com, push the create account button, and follow the process. After you receive the credentials, log in, and you are ready to use it.
”Show me the big picture! I want to see the big picture” – I’m sure you said and heard these words many times in your life.
For all of us, seeing the big picture is essential as it provides clarity. We can see how things connect and why they are important.
PROCESIO’s Process Designer is about building and sharing the big picture of any integration and workflow automation, and in this video, you will learn how to use it.
We just need a basic understanding of the PROCESIO platform and a case study for the demo to achieve this.
Because we really want you to feel how valuable the “Process Designer” is, we will build the demo application first without any explanation about the use case. We promise that if you have some experience with business processes integration and automation, you will figure it out by yourself.
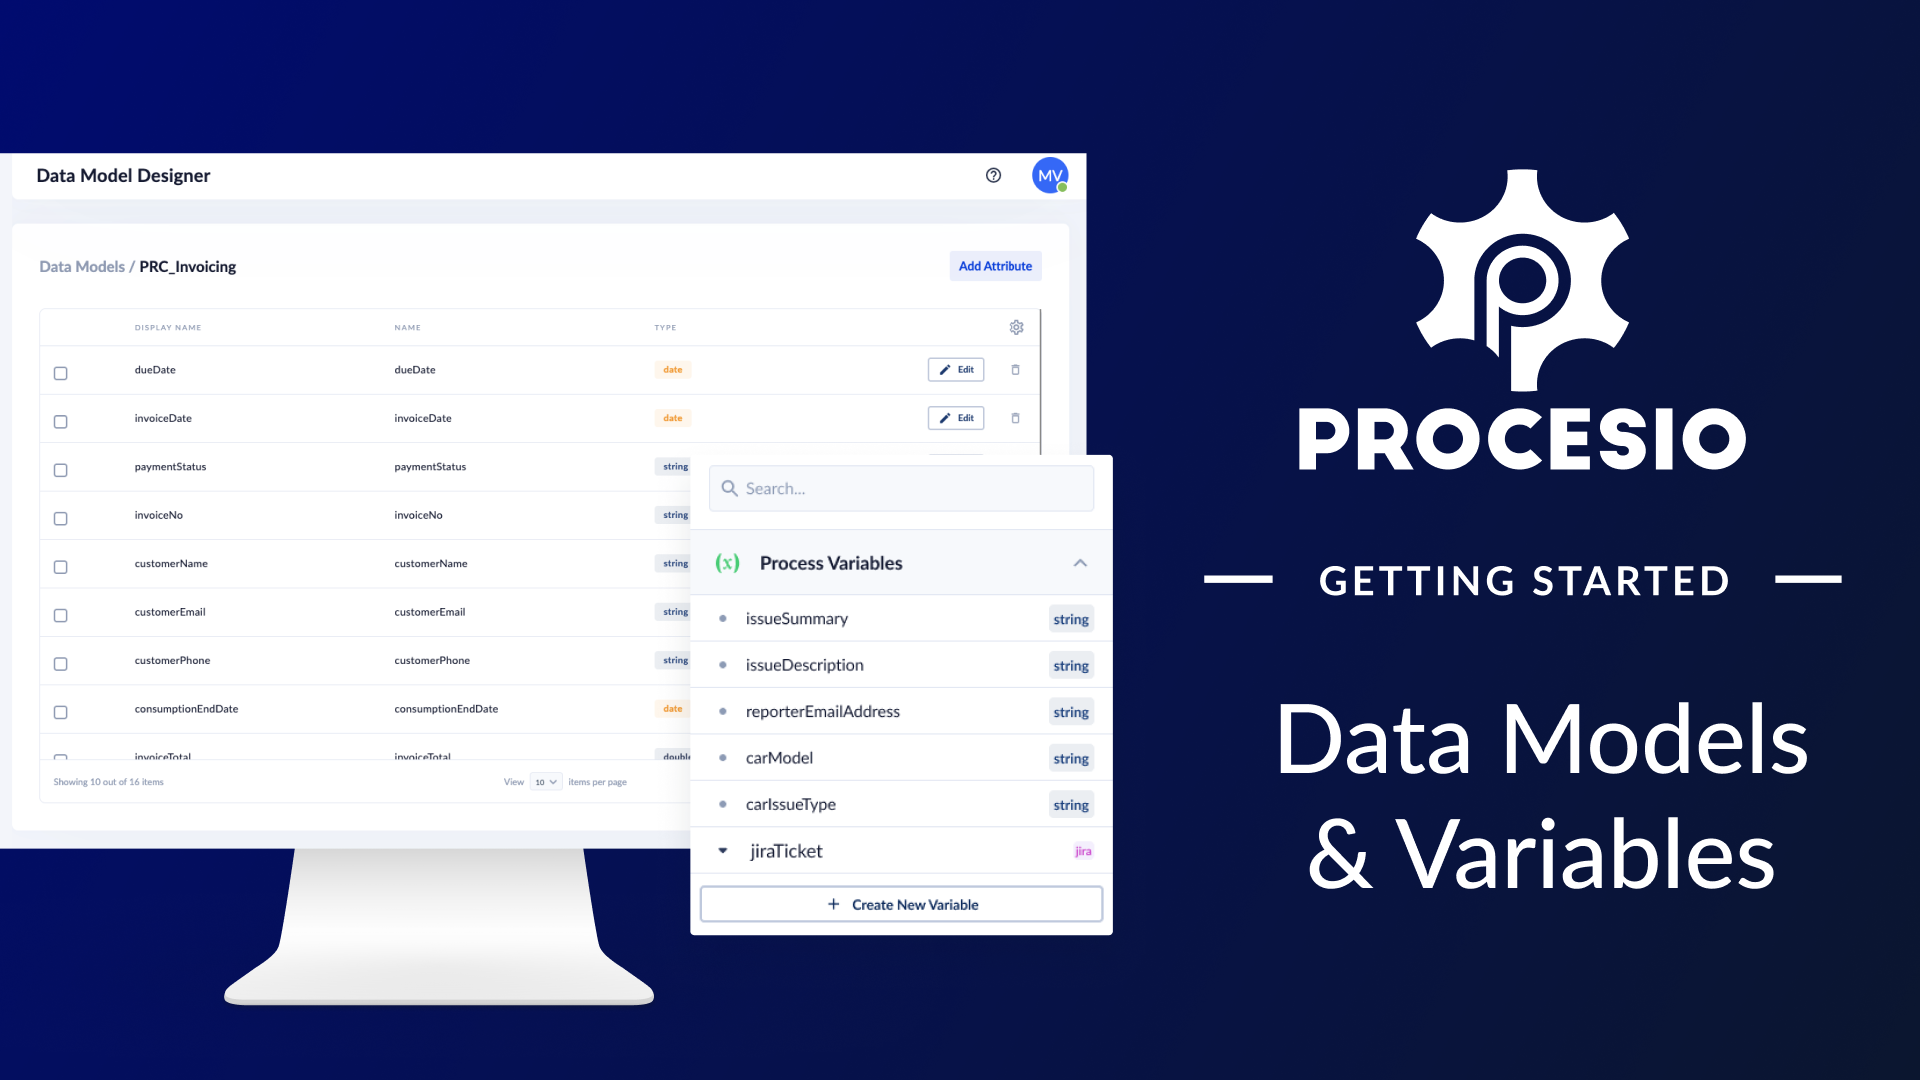
In the previous video, we drew the big picture of our workflow automation process on the digital canvas. Now it’s time to define each action of the process, and in this video, we’ll focus on the first action, “Get File Data”.
By doing this, you will learn how to create data models using the “Data Model Designer” and work with “Variables”. We assume that you have a basic understanding of the data model and variable concepts in general.
If you are recreating the steps in the demo, here is the excel file.
Learn more about the features presented in this videos also on our documentation:
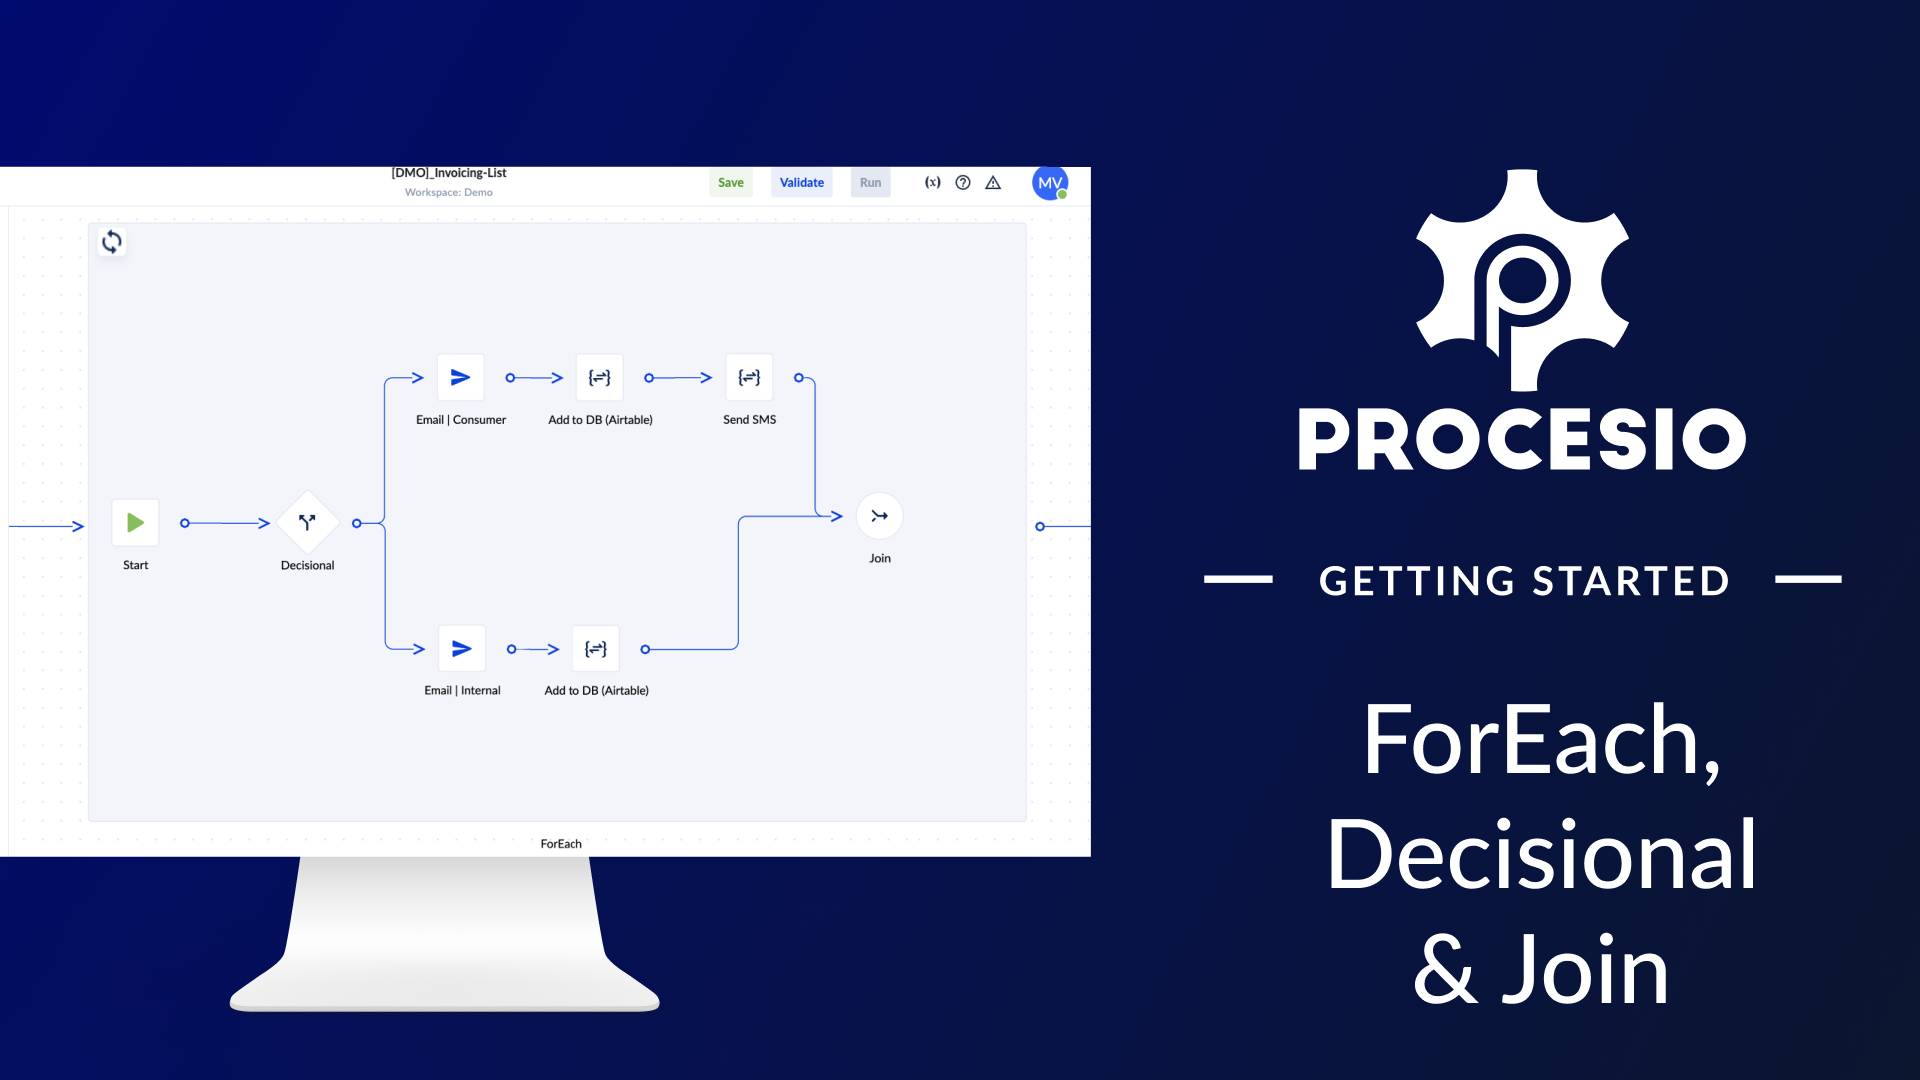
The business process we automate in our demo requires sending notifications to customers and to the process owner for all invoices issued based on data stored in a file.
To do this, we added on the canvas a “ForEach” action. Because we want to send different notifications based on the invoice’s status, we added a “Decisional” action. And we added a “Join” action at the end because no matter the type of notification sent, we want to inform the process owner about the status of the process.
In this video, you will learn how to set up these actions.
Learn more about the actions in this video also on our documentation:
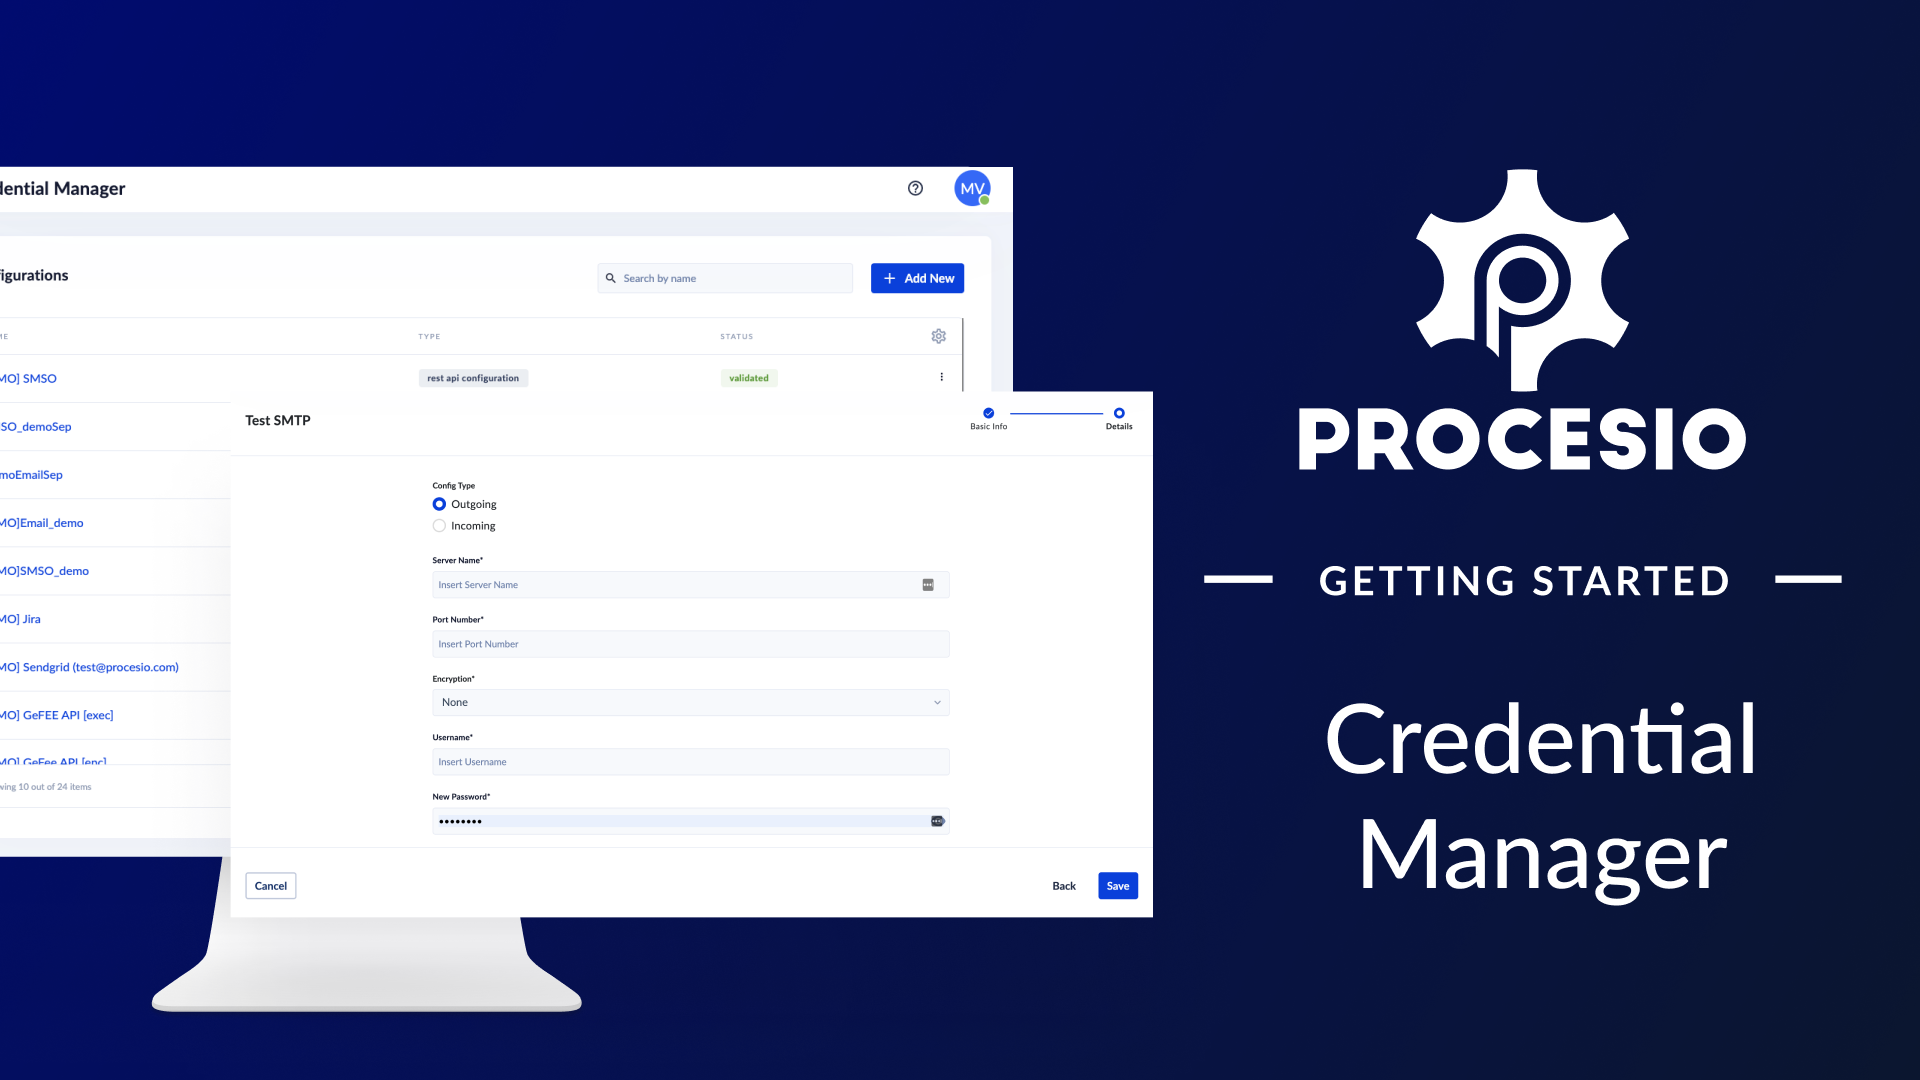
Any integration or data migration project needs to get data from different sources, process it, and store it, therefore connecting to external applications is a necessary functionality. In this video, you will learn how to manage connections to external applications through the “Credentials Manager”.
Learn more about the Credentials Manager also on our documentation page.
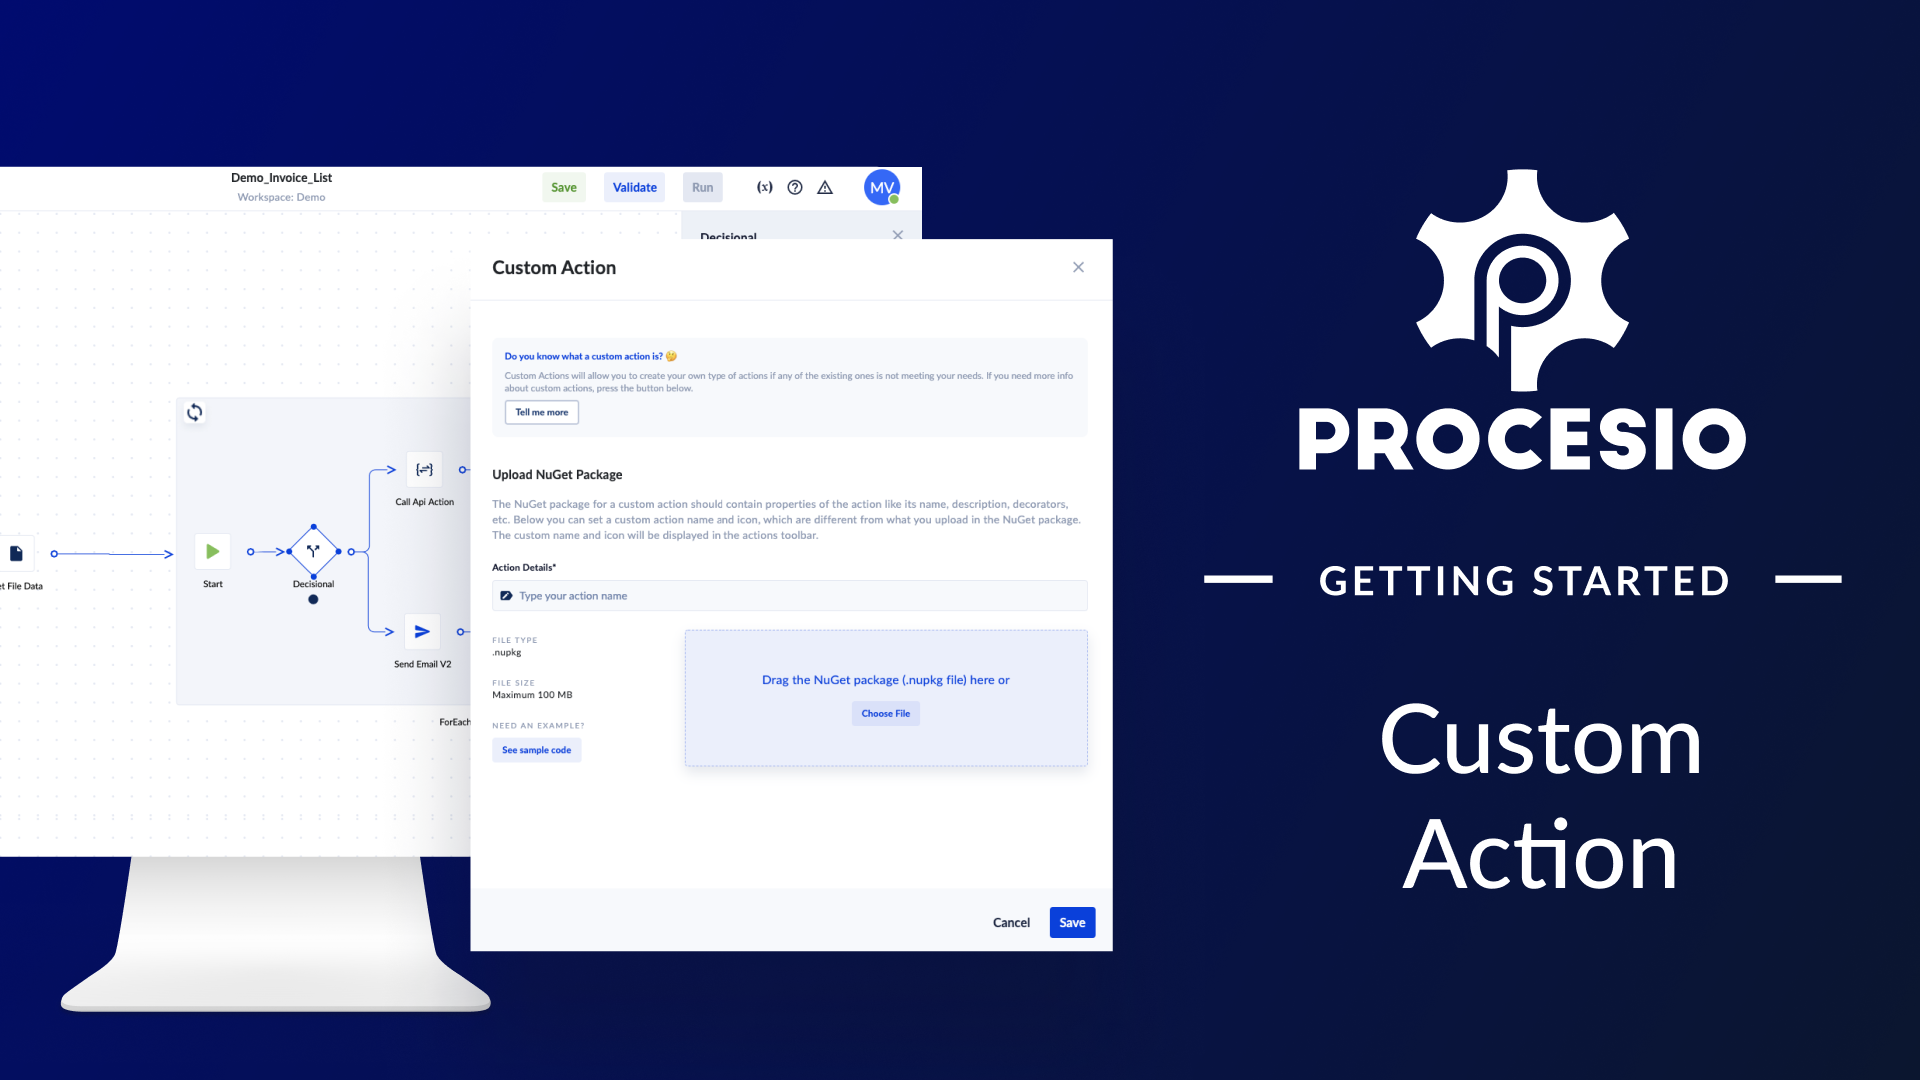
One thing that people and businesses usually do not like is to be dependent on a vendor. Vendor lock-in or vendor dependency is always a business risk and needs to be mitigated.
PROCESIO allows you to rely less on the integration capabilities of the business application you use, and with “Custom Actions”, you are less dependent on PROCESIO. This unique feature allows you to add the capabilities you need without waiting for us to develop them. Whatever you need, you can develop and reuse anytime you want in all the processes that run under your account.
In this video, you will learn how to add a custom action and how to use it.
Learn more about Custom Actions also on our documentation:
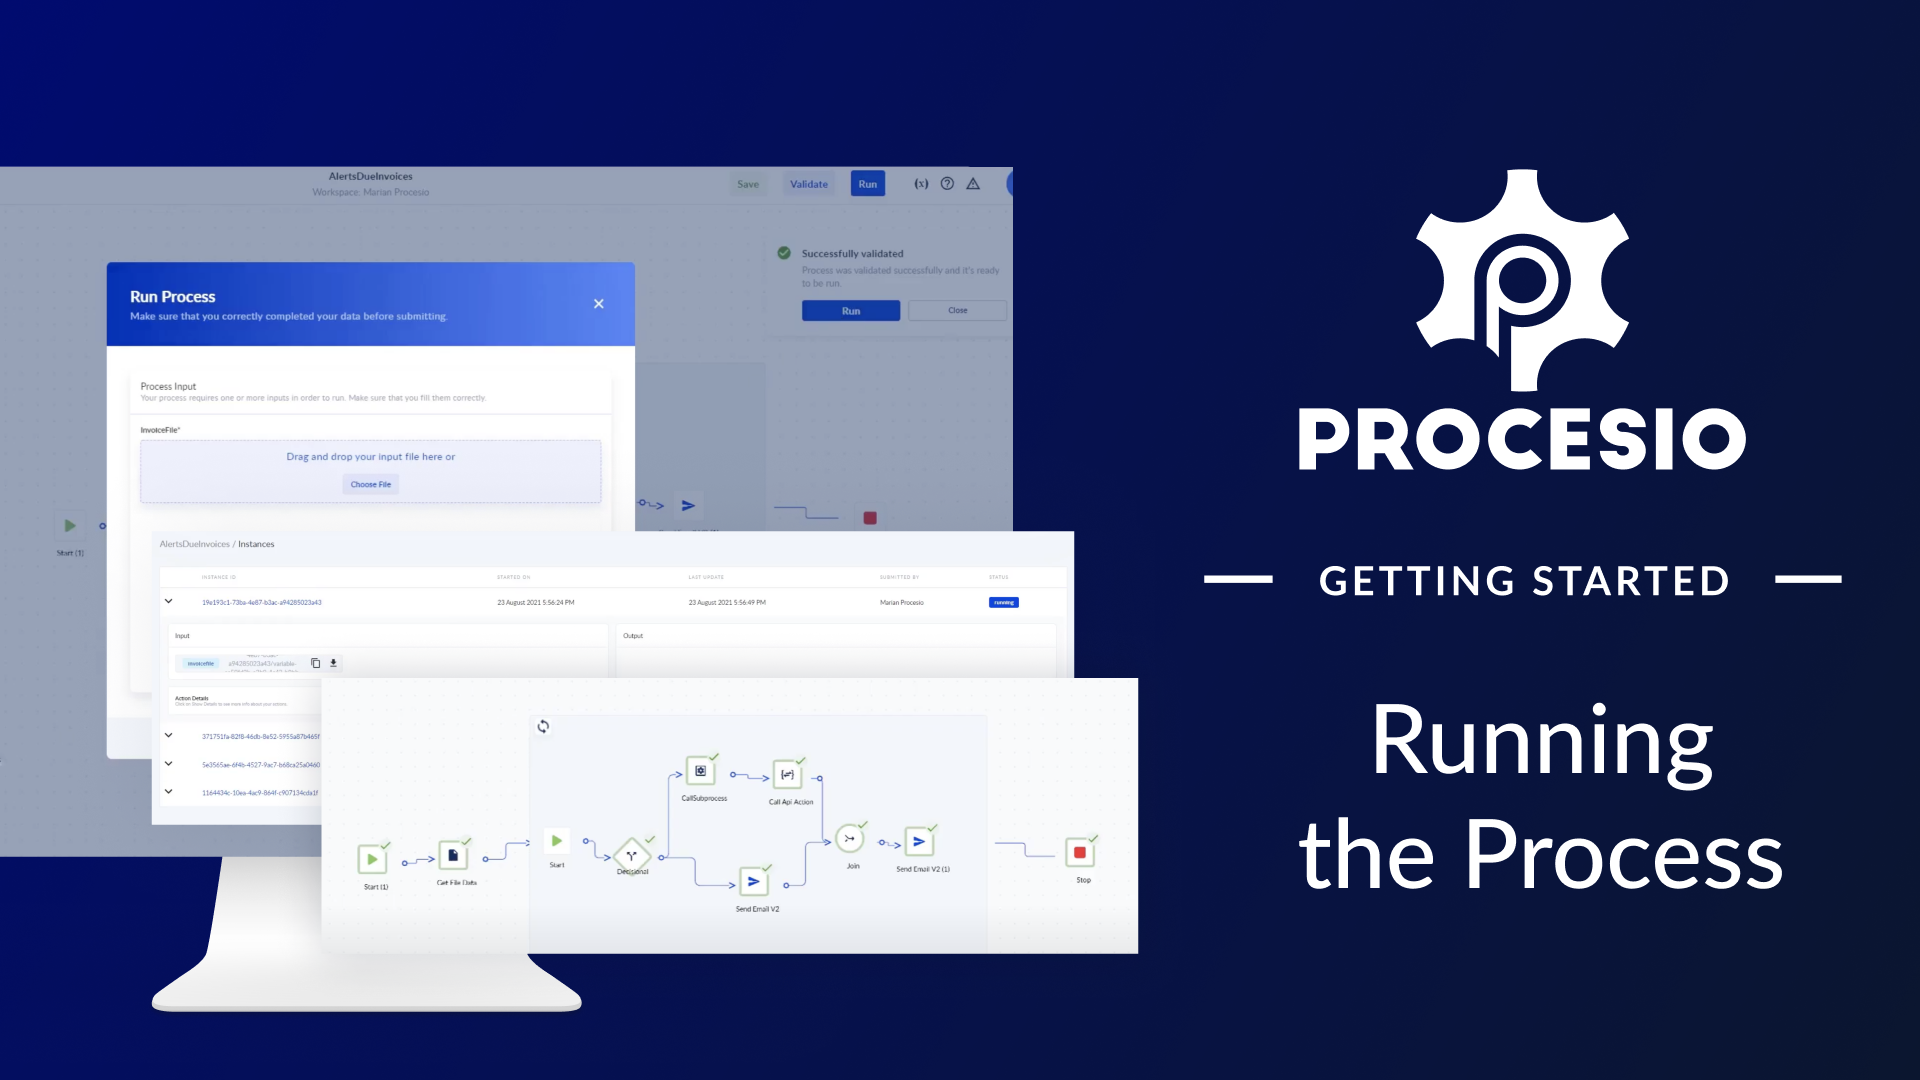
As you’ve seen, we were able to create a process that automates notifications in just several minutes. Now it is time to test it and see the result. If you built along and want to make sure your process works, please add your data in the excel file for the demo.
Learn more about the steps in this video also on our documentation page:
